Half Pitch Interface Connector, DX Series
Caution
Product Description
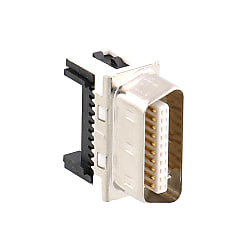
I/O Connector with a 1.27-mm pitch (Hirose Electric Original Type). A selection of two types of lock methods and abundant variations for wire connection and implementation methods are available.
Connector For Half-Pitch Interface

DX Series list
Specifications of DX Series Half-Pitch I/O Connectors (Original Type)
Product Standards
| Item | Standard Value | |
|---|---|---|
| Operating Temperature Range | -55 to +85°C | |
| Rated Current | 0.5 A | |
| Rated voltage | 125 V AC | |
| Contact resistance | 50 mΩ or less at 100 mA DC | |
| Insulation resistance | 250 MΩ or more at 100 V DC | |
| Withstand voltage | 300 V AC r.m.s for 1 minute | |
Product Standards
Materials/Processing
| Part Name | Materials | Color/Finish | |||
|---|---|---|---|---|---|
| Plug case | Zinc diecast | Silver coating | |||
| Receptacle case | Zinc diecast | Nickel plating | |||
| Insulator | PBT resin or equivalent or better* | Black* | |||
| Male contact | Copper alloy | Selective gold plating | |||
| Female contacts | Copper alloy | Selective gold plating |
- *UL94V-0
- *In order to prevent mixing of types for AWG#28 insulation displacement (30 A, 31 A, 32 A, 33 A) and types for soldering, a portion of the insulator has been made translucent white in order to enable identification
Compatible cables
| I/O Cable | |||||
|---|---|---|---|---|---|
| Conductor size | AWG#30 | AWG#28 | |||
| Conductor configuration | 7/0.1 | 7/0.127 | |||
| Insulator outer diameter | ø0.5 | ø0.58 | |||
| Cable UL style | UL20276 and UL2789 | ||||
I/O Cable
| Ribbon, Flat Cable | ||||
|---|---|---|---|---|
| Conductor size | AWG#28 | |||
| Conductor configuration | 19/0.08 | |||
| Cable thickness | 0.9 | |||
| Cable UL style | UL2651, UL2734, UL20012 | |||
Ribbon, Flat Cable
Product Variations

Connector for one-touch lock interface

Connector for screw lock interface

Plug-in connector
Product Termination Method
For Discrete Cables

1. Align the wiring jig case guide with the connector pins and set the protector.

2. Clamp the cable and terminate each signal wire to the protector.

3. Combine the 2 protectors and temporarily fasten to the connector main body.

4. Set the guide plate to the connecting press.

5. Set the connector to the guide plate and insert the guide plate into the connecting press.

6. Pull the handle down towards you. (This completes termination and cutting of extra cable)
For 1.27‑mm Pitch Fused Cables

1. Set the guide plate to the connecting press and set Protector C to the jig.

2. Set the 1st cable. (Fix the 1st cable using the cable clamp (1) of the guide plate)

3. Combine Protector D with Protector C.

4. Set the 2nd cable. (Fix the 2nd cable using the cable clamp (2) of the guide plate)

5. Temporarily fasten the connector main body to the protector.

6. Move the slider base to the insulation displacement position and push down the handle. (This completes termination)